
Roasting coffee beans at home is a simple yet rewarding way to unlock the full flavor potential of your brew. It transforms raw green beans into rich, aromatic coffee that suits your exact taste preferences. Many beginners think roasting requires fancy equipment, but all you need is patience, attention to detail, and basic tools like a pan, oven, or popcorn popper. The process is hands-on and sensory—you’ll listen for cracks, watch colors change, and smell the aroma deepen as the beans roast.
Home roasting also gives you total control over freshness and flavor. You decide how light or dark your roast will be, ensuring every cup matches your preferred strength and style. This beginner’s guide will walk you through each stage of the process, including recommended temperature ranges for every step. With a little practice, you’ll be brewing coffee that’s fresher, more flavorful, and uniquely yours.
What You’ll Need
Before you begin, gather these items:
- 1.Green (un-roasted) coffee beans — many roasters suggest choosing good quality green beans so you’ll have better taste later.
- 2. Rroasting method: this could be a popcorn popper, a stove-top pan, an oven, or a dedicated home coffee roaster.
- 3. Thermometer (optional, but helpful) to monitor temperature.
- 4. Metal colander, baking tray or cooling tray to cool the beans after roasting.
- 5. Safe space with good ventilation (roasting produces smoke and chaff).
- 6. Storage container (air-tight) for your roasted beans once cooled.
Why roast your own beans?
Roasting coffee at home brings a few benefits:
- You control how dark or light the roast is (so you choose the flavour).
- You get fresher beans — home-roasted coffee often tastes more vibrant than store-bought roasts.
- You can experiment and learn about coffee flavours, origins, and roast levels. According to one source: “Home coffee roasting is as simple (or as technical) as you want to make it.
Roasting Step-by-Step
Step 1: Choose your green coffee beans
Green coffee beans are the seeds of the coffee cherry before they’re roasted. They look pale-green or grey-green.
Tips for choosing:
- 1.Start with a small batch, maybe 100–200 g, so you can practice without wasting.
- 2. Try beans from different origins to see which flavours you like. One website suggests “sample sets” of different green beans to learn flavour differences.
- 3. Store green beans in a cool, dark, dry place until you roast them.
Step 2: Decide your roasting method
There are many ways to roast coffee at home. Each has pros and cons.
- 1. Popcorn popper: Affordable and good for beginners. One site calls it “the best of the DIY methods”.
- 2. Stove-top skillet or pan: Gives you visibility of the beans, but heat control is tougher.
- 3. Oven: Easy if you already have one, though the evenness of roast may vary.
- 4. Dedicated home roaster: If you plan to roast often or larger batches, this is the premium option. It may cost more.
Pick the method you’re comfortable with and can safely manage.
Step 3: Roast your beans — the process
- Pre-heat (if your equipment allows):
If your roaster or pan can heat ahead, bring it to about 180 °C – 200 °C (355–390 °F). This helps beans roast evenly once added. - Add green beans and start roasting:
Add your measured green beans and begin roasting. Keep the beans moving for even heat.
Aim for a starting temperature around 195 °C – 210 °C (383–410 °F) in the first few minutes. - Observe the stages:
- Drying / Yellowing stage (160 – 170 °C / 320–338 °F): Beans lose moisture, turn yellow, and release steam.
- Browning / Maillard phase (170 – 190 °C / 338–374 °F): Aromas shift from grassy to sweet; sugars begin caramelising.
- First crack (196 – 205 °C / 385–401 °F): You’ll hear clear pops. This marks a light roast — many home roasters stop here for bright, balanced flavour.
- Beyond first crack (210 – 220 °C / 410–428 °F): Beans darken into medium roast territory — fuller body, less acidity.
- Second crack (225 – 240 °C / 437–464 °F): Sharper cracking sounds, smoky smell, oils may appear. This is dark roast level. Stop before 245 °C (475 °F) to avoid burning.
- Decide your roast level and stop:
Choose your target roast and remove beans immediately when they hit that temperature range. - Cooling immediately:
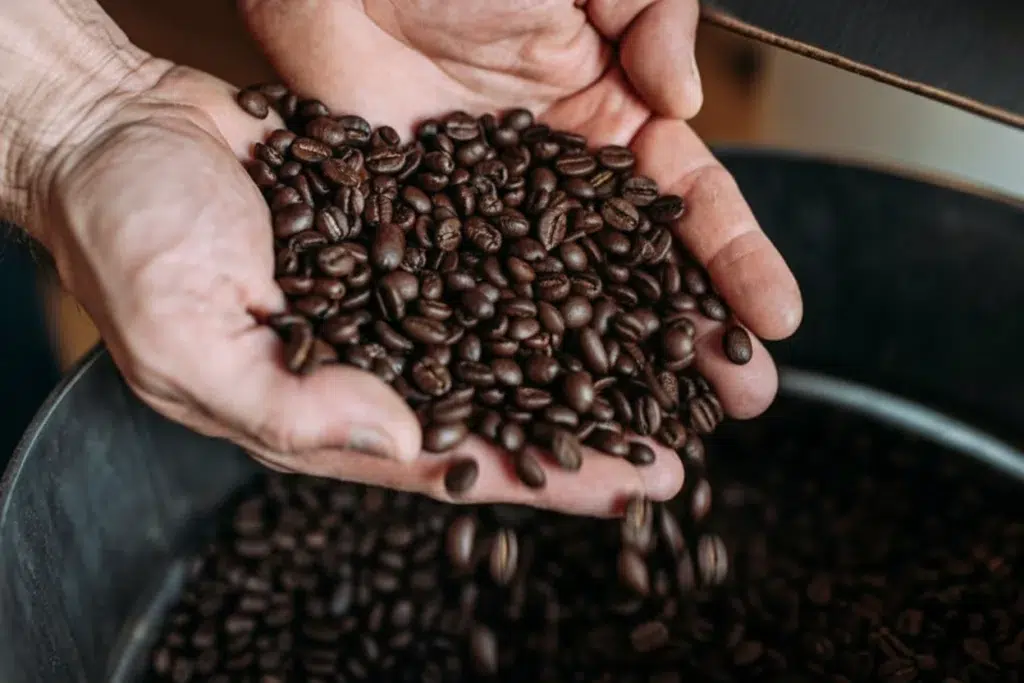
Transfer beans to a metal colander or baking sheet and stir or fan them until cool to touch. Cooling halts the roasting process and locks in flavour.
Step 4: Resting and storing your roasted beans
After roasting and cooling:
- Let the beans rest (also called “degas”). Some flavour compounds stabilize after roasting. One source noted darker roasts benefit from more rest time.
- Store in an airtight container once cooled. Keep out of direct light, heat, moisture.
- For best flavour: use beans within a week or two of roasting (especially for fresh flavour).
Step 5: Grinding and brewing your home-roasted coffee
When you’re ready to brew:
- Grind your beans according to your brewing method (drip, pour-over, espresso)
- Taste the difference: you’ll pick up more of the bean’s origin flavour (fruity, floral, nutty) if you roasted light-to-medium.
- Adjust: If the coffee tastes underdeveloped (sour, grassy), maybe your roast was too light or you ended just before first crack. If it tastes burnt or flat, you may have gone too dark or overcooked.
Troubleshooting & tips for beginners
Here are some helpful tips:
- Start small: Roast maybe 100 g or less for your first few tries, so you can test and learn without wasting beans.
- Take notes: Write down your batch size, time, temperature (if you measure), when first crack happened, how many minutes post first crack you stopped. This helps you repeat what works.
- Watch evenly: Beans should move freely and heat should spread evenly; avoid scorching (burnt patches) and uneven colour.
- Ventilation: Roasting produces chaff (the thin skin that comes off beans) and smoke; make sure you have good airflow or do this in a space that can handle it.
- Don’t go too dark too soon: Many beginners think “darker = better” but often you’ll lose the unique flavours of the origin if you roast too dark. Light-to-medium gives more complexity.
- Rest time matters: Let the roasted beans rest 24-48 hours before brewing (especially darker roasts) so flavours settle.
- Expect variation: Every batch may taste slightly different. That’s normal. Your skill in roasting will improve with practice.
Common roast levels & what they mean
Here’s a simple view of roast levels (what they look/sound/feel like) and how flavour changes as you go darker:
- Light roast / just after first crack: Brown colour, more origin flavour (fruit, floral, acidity).
- Medium roast (City / Full City): A bit darker brown, more body, flavour starts shifting from origin toward roast character (caramel, chocolate).
- Dark roast (second crack, French roast): Very dark brown to nearly black, oils may appear on surface, you’ll taste more roast flavour (smoke, dark chocolate, less brightness). Some origin flavour is lost.
Why the beans change colour and crack
Here’s why things happen during roasting (in simple terms):
- Green beans have moisture. The first stage is drying.
- Then heat causes chemical reactions (Maillard reaction, caramelisation) that change flavour, aroma and colour.
- The “first crack” happens when the bean expands and internal pressure causes the shell to crack. That’s a key milestone.
- If you keep roasting after the first crack, the sugars break down, oils migrate out, the bean darkens, and the flavour shifts. Go too far and you’ll get burnt/charcoal taste.
Safety and practical considerations
- Always roast in a well-ventilated area (window open, fan on).
- Use equipment rated for this purpose or that has good heat tolerance. If using DIY methods (pan or popcorn popper) be cautious of overheating, fire risk, smoke.
- Be aware of hot surfaces and hot beans—use gloves or a long-handled tool when cooling/traying.
- Clean up the chaff (bean skins) after roasting. They can collect and pose a fire hazard if left in roaster.
FAQs
What temperature should I roast coffee beans at home?
For beginners, start roasting around 195–210 °C (383–410 °F). The first crack happens near 200 °C, and a medium roast usually finishes around 215–220 °C. Avoid exceeding 245 °C to prevent burning.
How long does it take to roast coffee beans?
A small batch typically takes 10 to 15 minutes, depending on your method and heat level. Lighter roasts finish closer to 10 minutes, while darker roasts may take longer.
Can I roast coffee beans in an oven or pan?
Yes. You can use an oven, skillet, or popcorn popper if you don’t have a home roaster. Just make sure to keep the beans moving for an even roast and good airflow to handle smoke.
How do I know when my coffee beans are done roasting?
Listen for the first crack—it signals a light roast. For a medium roast, continue for about 1–2 minutes after that. Stop before the second crack if you want to avoid a smoky or bitter taste.
How soon can I use coffee beans after roasting?
Let roasted beans rest for 24–48 hours to release carbon dioxide and develop balanced flavor. Store them in an airtight container and use them within two weeks for the best freshness.
What’s the best roast level for beginners?
A medium roast is ideal for beginners. It balances acidity and body, giving a classic coffee flavor without being too bright or too smoky.
Final thoughts
Roasting your own coffee beans is both fun and rewarding. At first it may feel like you’re juggling lots of variables (bean origin, roast time, equipment, ventilation), but with each batch you’ll learn more. Keep notes, taste carefully, and adjust. The key is practice and patience. Soon you’ll be brewing cups of coffee that you roasted and are proud of.
