Why Pour-Over Works
Pour-over brewing gives you control — you decide everything: how hot the water is, how fine the grind is, how steady your pour is, and this coffee brewing ratios and grind size chart provides a quick reference for balancing these variables.
That means you can bring out the subtle flavours of your beans, not just large bold sweeps. It also produces a cleaner cup compared with many automatic methods because you’re manually pouring fresh hot water over the bed of coffee grounds, one controlled stream at a time.
By using the pour-over method at Brewed Within, we aim for clarity, balance and full flavour in every cup.
What You’ll Need: Tools & Ingredients
Here’s your checklist for brewing pour-over with BrewedWithin beans.
Tools you need
- 1. A pour-over dripper (e.g., cone type like V60, flat-bottom dripper like Kalita, or other similar)
- 2. Paper filter, or reusable filter if your dripper supports it.
- 3. Gooseneck kettle (helps with precise pour control, especially concentric circles and slow steady stream)
- 4. Digital scale (so you weigh coffee and water accurately).
- 5. Timer (or use your phone timer).
- 6. Coffee grinder (fresh whole-bean grind is best).
- 7. Mug or carafe to brew into.
Ingredients
- 1. Whole-bean coffee from BrewedWithin (you’ll grind just before brewing for best freshness).
- 2. Filtered or clean water (since water quality affects taste).
- 3. Paper or reusable filter appropriate for your dripper.
Recommended Ratios & Settings
- 1. Coffee to water ratio: a good place to start is about 1 g coffee : 16-17 g water (or about 1:16-1:17) which many guides suggest.
- 2. Grind size: medium to medium-fine (somewhere between table salt size and fine sand) depending on your dripper design.
- 3. Water temperature: around 90-96 °C (195-205 °F) is common.
- 4. Brew time: roughly 2:30 to 3:30 minutes for a single cup, depending on amount and dripper.
Step-by-Step: Brewing Pour-Over
Follow this sequence for one cup (you can scale up later once you’re comfortable).
Step 1: Heat Water and Prepare Your Setup
- 1. Fill your kettle with clean filtered water and bring it to just below boiling (around 90-96 °C).
- 2. While water is heating, set up your dripper on top of the mug or carafe. Insert your filter into the dripper.
- 3. Rinse the filter: pour a little hot water through the filter to remove any paper taste and to pre-warm the dripper and mug. Discard the rinse water from the mug.
- 4. Place the dripper + mug (or carafe) on your scale and tare to zero.
Step 2: Measure and Grind the Coffee
- 1. Weigh your coffee beans. Let’s say you decide on 20 g of coffee for a single cup.
- 2. Grind to a medium-fine consistency — imagine texture just slightly coarser than table salt or fine sand.
- 3. Place the grounds into the rinsed filter. Gently shake or level the bed so it’s even.
Step 3: Start the Brew (Bloom)
- 1. Zero your scale again (so you ignore the weight of the dripper + mug).
- 2. At time = 0, start the timer and pour about twice the weight of your coffee in water to wet all grounds. For example, if you used 20 g coffee, pour ~40-45 g of water. This is the bloom phase — it lets trapped gases escape and helps ensure even extraction.
- 3. Let the grounds sit for about 30-45 seconds. You’ll see them swell (expand) slightly.
Step 4: Main Pour(s)
- 1. After the bloom, continue pouring the remaining water in one or more slow, controlled pours. For example, if you aim for 20 g coffee : 320 g water (1:16), and you’ve already added ~40 g, you’ll pour the remaining ~280 g in stages.
- 2. Use a gooseneck kettle and pour in a steady circular motion (from centre outward and back) to wet all the grounds evenly and avoid channeling (where water flows too quickly through one path).
- 3. Aim to finish your pouring by around 2-3 minutes, so total brew time (bloom + pour + drip) ends around 2:30-3:30 minutes. Some setups may take slightly more or less.
Step 5: Let the Coffee Drain & Serve
- 1. Once you’ve poured all your water, allow the dripper to finish dripping. When the dripping slows and stops (or when you reach your target brew time), remove the dripper and discard the used grounds and filter.
- 2. Swirl the coffee in your mug or carafe briefly to mix. Take a moment to inhale the aroma.
- 3. Pour into your cup (if brewing into a carafe) and enjoy the fresh BrewedWithin pour-over coffee.
Step 6: Clean Up
- 1. Rinse the dripper and rinse the carafe or mug.
- 2. Clean the kettle if needed (especially if you use mineral rich water).
- 3. Keeping your brew gear clean ensures each future brew tastes as good as the one before.
Troubleshooting Quick Reference
Problem | Likely Cause | Suggested Fix |
Coffee tastes weak or sour | Too coarse grind, too quick brew, low dose | Finer grind, increase coffee dose, extend pour time slightly |
Coffee tastes bitter or harsh | Too fine grind, too long extraction, water too hot | Coarser grind, reduce brew time, lower temperature |
Brew finishes too fast | Grind too coarse, coffee bed too shallow | Use more coffee, finer grind, ensure even bed depth |
Brew finishes too slow | Grind too fine, over-packing grounds | Coarser grind, loosen bed, check filters and dripper cleanliness |
Flavour inconsistent | Variables changing (grind, water, time) | Keep consistent measurements, note changes, adjust one variable at a time |
Tips & Tweaks for Better Results
Here are some extra tips for dialing in your coffee and solving common problems:
- 1. Grind size adjustment: If the brew finishes too fast ( 4 minutes) and tastes bitter or over-extracted, make the grind a bit coarser.
- 2. Water temperature matters: Darker roasts may taste better with slightly cooler water (85-90 °C) to avoid over-extracting bitter compounds. Lighter roasts benefit from hotter water (~94-96 °C) to extract the bright flavours.
- 3. Even pouring: Avoid pouring all water in one place; instead, gently move the stream in concentric circles so all grounds see water evenly. This helps avoid channeling and uneven extraction.
- 4. Use fresh beans: Coffee tastes best when brewed within a few weeks of roast date. Store beans in an airtight container, away from light, heat, and moisture.
- 5. Water quality: Use filtered water if possible. Hard water or water with strong mineral or chlorine flavour can interfere with extraction and the final taste.
- 6. Pre-heat gear: Rinsing your filter and dripper with hot water before brewing helps maintain the correct brewing temperature and makes the cup more consistent.
- 7. Scale and timer: Using a scale and timer helps make the process repeatable. When you control coffee weight, water weight, grind, and time, you can adjust one variable at a time to refine taste.
- 8. Taste regularly: As you brew more pour-overs, you’ll notice subtleties in flavour — sweetness, acidity, body. Keep notes on what you liked or didn’t like, and adjust your method accordingly.
Advanced Tweaks (Once You’re Comfortable)
When you feel ready, you can experiment with these:
- Alternate Pouring Patterns: Try pulses (e.g., 50 g water at a time, wait 10-15 seconds, then pour again) to influence extraction dynamics.
- Different Ratios: For more intensity, use 1:15 ratio (coffee : water). For lighter cup, 1:18 or 1:20 ratio.
- Different Drippers: Try switch from cone (V60) to flat-bottom (Kalita) for more forgiving brew. Some drippers make the method easier for beginners.
- Filter Type: Use a thicker paper filter for a cleaner cup (less oils), or try a reusable metal filter to allow more body and oils.
- Temperature Experimentation: Light roast beans may benefit from hotter water (~96 °C); darker roasts may be better with slightly lower (~90-92 °C).
- Pre-infusion / Bloom Adjustments: You could increase bloom water or bloom time slightly if beans are very fresh (they’ll release more CO₂).
Why This Method Works for Brewed Within
Our goal at Brewed Within is to let the bean speak — meaning you taste the origin, the roast profile, and the unique flavour rather than only generic “strong coffee.” The pour-over method supports this goal because:
- It gives clarity — you’re not drowning flavour under excess water or rapid drip.
- It gives balance — the slow, steady pour ensures even extraction, reducing harshness or bitterness.
- It is adaptable — once you learn the method, you can tweak ratio, grind and brew time to match any roast or bean.
- It looks good — but more importantly, it tastes good. When you use this method, you’ll get a cup that reflects the care we put into roasting at Brewed Within.
How To Use Pour-Over
Equipment
- Pour-over dripper (e.g., cone type like V60, flat-bottom dripper like Kalita, or other similar).
- Paper filter, or reusable filter if your dripper supports it.
- Gooseneck kettle (helps with precise pour control, especially concentric circles and slow steady stream).
- Digital scale (so you weigh coffee and water accurately).
- Timer (or use your phone timer).
- Coffee grinder (fresh whole-bean grind is best).
- Mug or carafe to brew into.
Ingredients
- Whole-bean coffee
- Filtered or clean water (since water quality affects taste).
- Paper or reusable filter appropriate for your dripper.
Instructions
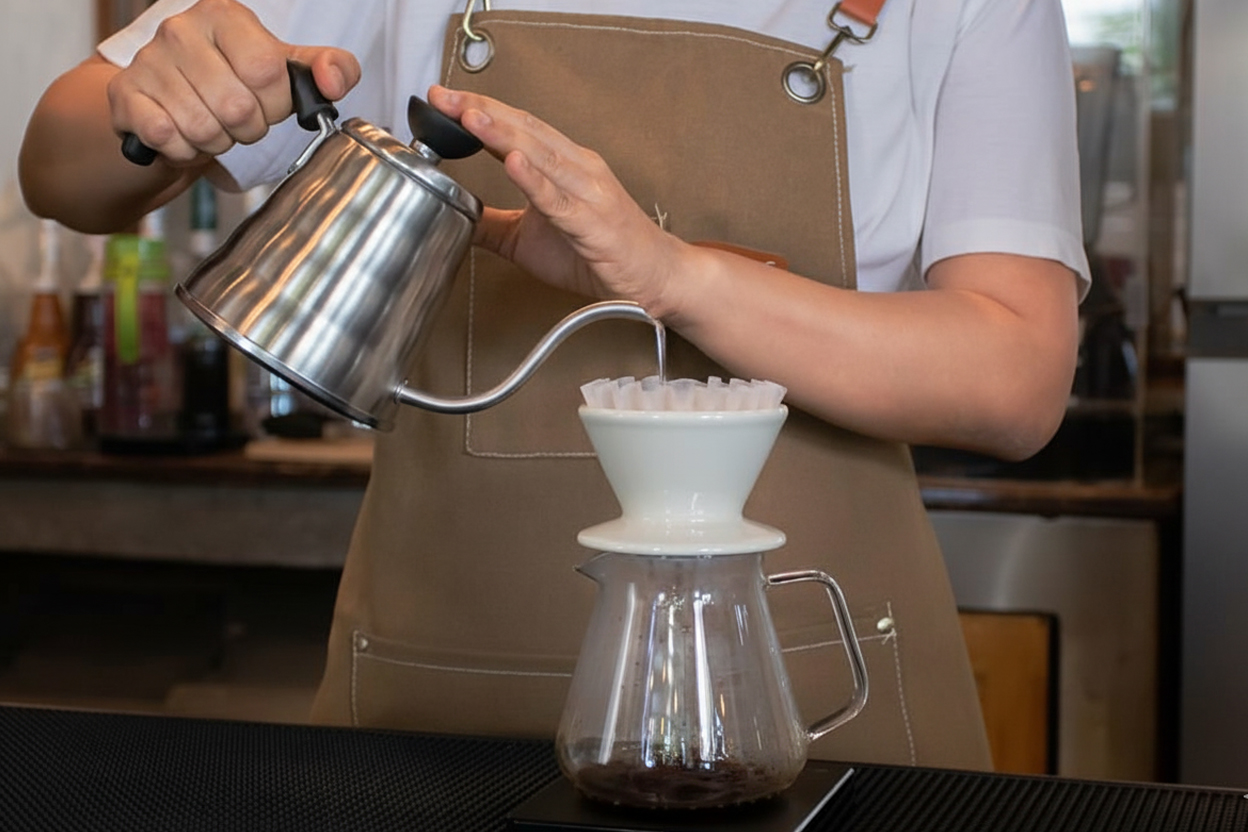
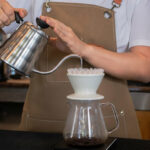
- Heat filtered water to 90–96°C, set up your dripper with a filter on your mug or carafe, rinse the filter to remove paper taste and prewarm, discard rinse water, place everything on the scale, and tare to zero.
- Weigh 20 g of coffee beans, grind to a medium-fine texture slightly coarser than table salt, then pour the grounds into the rinsed filter and gently level the bed.
- Zero the scale again, start the timer, pour about 40–45 g of hot water to wet all grounds for the bloom, and let it sit for 30–45 seconds until the coffee swells.
- Slowly pour the remaining 280 g of water in stages using a gooseneck kettle, maintaining a steady circular motion from center outward and back, and aim to complete pouring within 2–3 minutes for a total brew time of 2.5 - 3.5 minutes.
- Allow the dripper to finish dripping, then remove it and discard the filter and grounds, swirl your coffee to mix, inhale the aroma, and pour into your cup to enjoy.
- Rinse your dripper, carafe, or mug, clean your kettle if needed, and keep your brewing gear fresh for the next perfect cup.
Notes
Recommended Ratios & Settings
- Coffee to water ratio: a good place to start is about 1 g coffee : 16-17 g water (or about 1:16-1:17) which many guides suggest.
- Grind size: medium to medium-fine (somewhere between table salt size and fine sand) depending on your dripper design.
- Water temperature: around 90-96 °C (195-205 °F) is common.
- Brew time: roughly 2:30 to 3:30 minutes for a single cup, depending on amount and dripper
FAQs
What is a pour over coffee maker?
A pour over coffee maker is a manual brewing device that lets you pour hot water evenly over coffee grounds for a clean, flavorful cup. It offers full control over taste and strength.
What grind size should I use for pour over coffee?
Use a medium to medium-fine grind — about the texture of table salt. Too fine can cause bitterness, while too coarse leads to weak or sour coffee.
How much coffee and water should I use for pour over?
The ideal starting ratio is 1 gram of coffee for every 16–17 grams of water. For example, 20 g of coffee uses about 320–340 g of water. Adjust to taste.
What temperature should the water be for pour over?
Use water around 90–96 °C (195–205 °F). This range helps extract rich flavors without burning the coffee or leaving it under-extracted.
How long does it take to brew pour over coffee?
A typical pour over brew takes 2½ to 3½ minutes. The total time includes the bloom phase (30–45 seconds) and the main pour.
Why is my pour over coffee bitter?
Bitterness often comes from too fine a grind, over-extraction, or too hot water. Try using a coarser grind or lowering your water temperature slightly.
Do I need a gooseneck kettle for pour over coffee?
Yes, it helps. A gooseneck kettle gives you better control over pour speed and direction, ensuring even water flow and consistent extraction.
Should I rinse the paper filter first?
Definitely. Rinsing removes any paper taste and preheats the dripper, which helps maintain brewing temperature and improves flavor clarity.
Can I use reusable filters instead of paper?
Yes. Metal or mesh filters let more natural oils through, giving a fuller-bodied cup, while paper filters produce a cleaner, crisper taste.
What makes BrewedWithin’s pour over method special?
Brewed Within’s method focuses on clarity, balance, and smooth flavor — highlighting the natural sweetness and aroma of freshly roasted beans in every cup.
Final Words
Pour-over brewing is a craft, but it’s simple when you break it down. By using the tools above, following the step-by-step method, and tweaking little things as you go, you’ll get a great cup of coffee from Brewed Within — one that reflects your bean’s character, your taste, and your care. Start simple. Taste what you like. Adjust. Enjoy your cup. ☕
